From Standard Compostion Books
Figure 1 shows the composition book that is going to be transformed into two sturdy pocket notebooks and the standing press used in the process. The press is made so that four pieces of threaded rod can be used to clamp the sides together, holding the composition book tightly. While it is clamped in the press it can be be neatly cut into two pocket notebooks. The excess can be used to make one or more notepads. The clamp shown in the pictures is more complicated than needed. A simpler clamp to use is shown HERE
I stock up on composition books during the back to school sales before school starts in the fall, but they are available at reasonable prices all year.
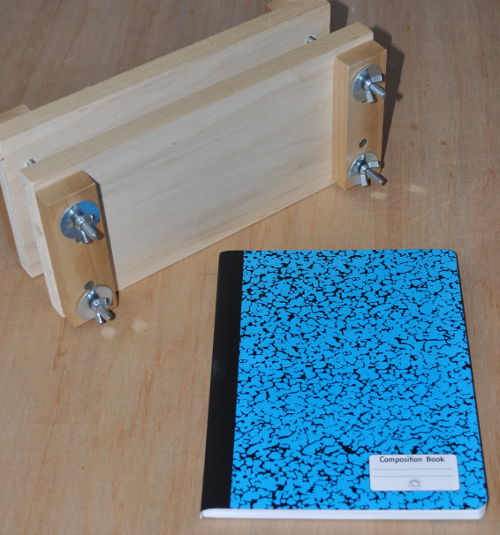
Figure 1
Figure 2 shows the composition book clamped in the press.
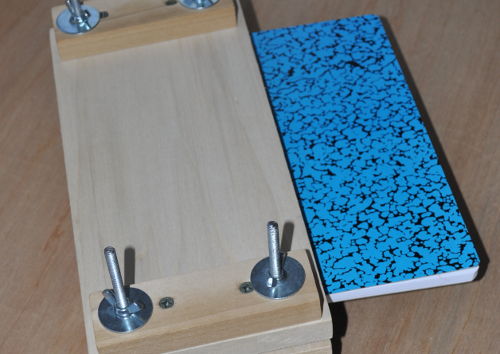
Figure 2
I made the first few notebooks before I made the press in the pictures. I used two pieces of wood held together with a pair of C-clamps. It was more awkward getting everything lined up and tight than with the press, but it worked just as well for the cutting. The press shown here was made for clamping hardcover books during the binding process and is more complicated than it needs to be for making pocket notebooks. See a simpler clamp for the job HERE.
The typical compostion book is 9.75 by 7.5 inches in size. I make my pocket notebooks 3.5 inches wide, which fits just right into my shirt pockets. The bound edge of the composition book goes into the clamp, with the loose ends of the pages out. If your pockets are a different size than mine, or if you want one a little bigger to go in a purse, cut them to the size you want. I stock up on composition books during the back to school sales before school starts in the fall, but they are available at reasonable prices all year.
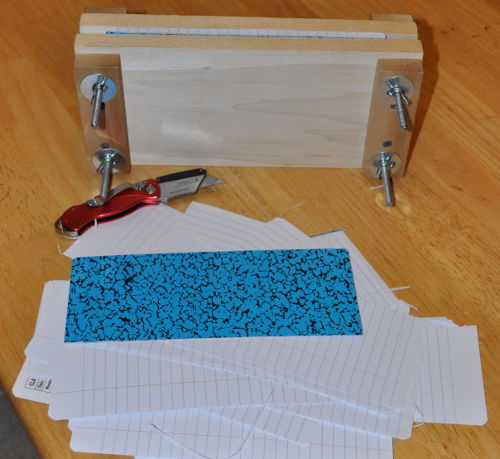
Figure 3
Use a knife with a sharp point and a sturdy blade to cut the loose ends of the pages and covers from the clamped part of the composition book. Don’t try to cut too much at once, let the knife do the work. Press lightly and use the edge of the press as a guide for the knife as you cut a little further each pass. After a few passes the cover will come free. Then a page or two will come free with each pass. Take your time, be careful with the alignment of the knife as you progress and you will get a neat smooth edge to the pages in the trimmed down notebooks. If you hurry you will probably not get as clean and neat an edge to the block of pages in your pocket notebooks. Use a sharp knife and it will do the work and you won’t have to push hard.
Making all the cuts from one side usually results in a cleaner, neater edge to the book than cutting from both sides. When cutting from both sides if you don’t meet exactly level with the other side there is an obvious bump in the edge of the pages when the notebook is closed. It should function just fine, but every time you look at it you’ll wish you had been neater.
It is likely that you will cut through some areas of the final cover before others. The point of the knife will come through in places while the remainder of the cover is still attached. Continue to use light strokes of the knife, letting the point do the work. Don’t force things at this point. If you do you might end up with a ragged edge on the cardboard cover.
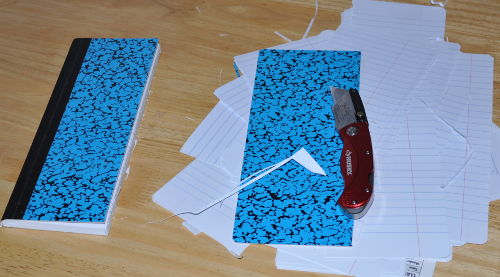
Figure 4
After the first cut is complete you will have a compostion book that is 9.75 inches tall and 3.5 inches wide.
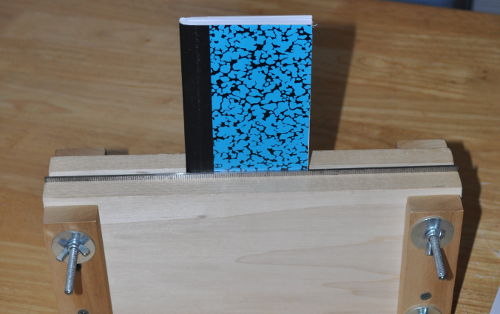
Figure 5
Now it’s back into the press for a second cut. In Figure 5 the book is clamped so the second cut will produce two equal parts. This gives two notebooks that are 4.875 inches tall and 3.5 inches wide.
The second cut is somewhat trickier than the first cut for two reasons. First,the bound edge is being cut so the pages don’t fall away as they are freed from the bound edge. Second, the bound edge itself need to be cut through.
I recommend cutting from the bound edge to the open edge for the second cut. As you cut into the depth of the notebook on this second cut hold the open end together, and if needed push the portion above the press back slightly to open the cut and make it easier to continue cutting the pages.
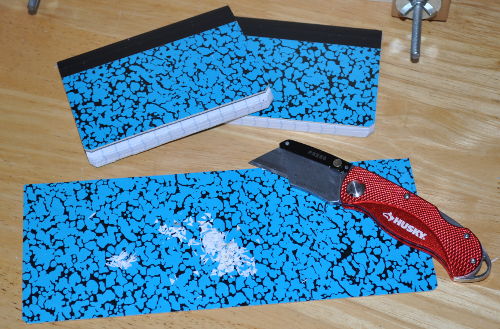
Figure 6
Sharp corners on the pocket notebook are not a good thing. Use the knife to trim the corners slightly. Lay the book on a flat surface and with a sharp blade slice the corners off. Figure 6 shows the trimmed notebooks and the confetti like corners that have been sliced off.
The excess cover material from the original composition book provides a convenient surface to put the notebooks on when slicing the corners off. If you cut too far it protects the table you are working on from damage.
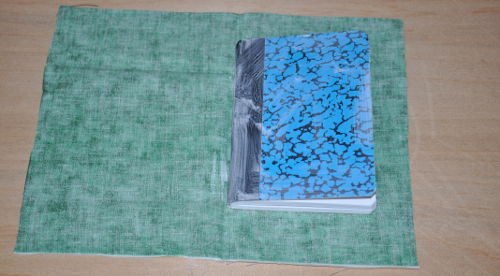
Figure 7
Figure 7 shows the pocket notebook glued down to the cloth that is going to cover it. The cloth cover adds durability and quality to the pocket notebook. Before the cloth is added it’s a cut up composition book. With the cloth covering it needs to be taken seriously. It is now a custom bound notebook and no longer a mass produced and disposable item.
The cloth should be cut to about 10 inches by 8 inches. This will allow about 1.5 inches on all four sides of the open notebook for wrapping around the cover.
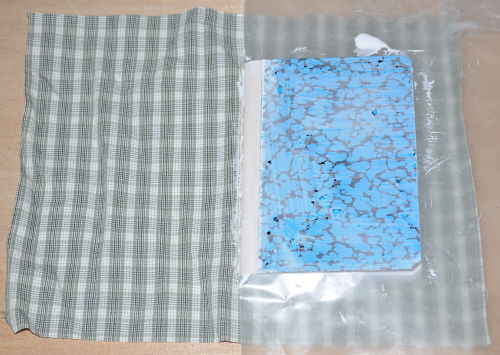
Figure 7A
Figure 7A shows the second pocket notebook cut from the original composition book. It is being covered with a different fabric (one that I cut from an old shirt.) Waxed paper is inserted between the cover and the pages so that the glue can be easily applied to the cover without having to worry about getting it onto the pages and causing damage to them. The cloth has already been glued to one of the covers. The second cover has been glued. Next the cloth will be wrapped around the bound edge and smoothed onto the second cover.
The black tape that is over the composition books bound edge may not be very securely attached. If you open the covers of the notebook so they are 180 degrees apart the black tape may gap away from the cover. It did here, so I removed it. This exposed the stitching holding things together. I gave it a coat of glue to lock the stitching then proceded to cover it the same way as if I had left the black tape in place. It probably doesn’t really matter which way you do it when making your pocket notebooks.
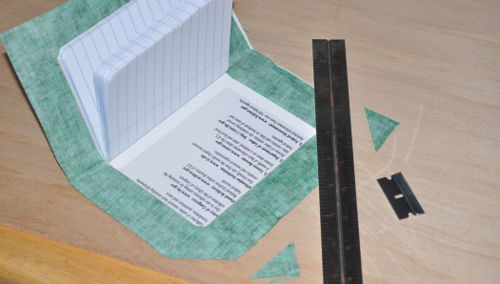
Figure 8
When the glue has dried the corners need to be trimmed. With an inch wide straight edge and a single edge razor blade the job is easy. Put the straight edge against the corner of the cover at a 45 degree angle and use the razor blade or the sharp point of a knife to trim off the corner of the cloth. Be sure that you are not cutting on a good surface. You won’t be popular if you put score marks into the finish of the dining room table. I have a piece of smooth plywood on my table so that the table is protected from both glue and cutting instruments. Trim all four corners.
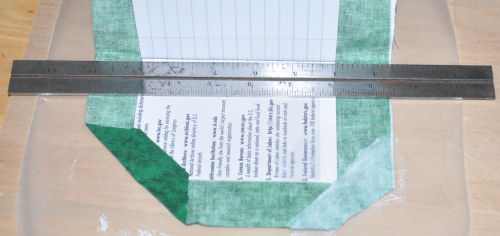
Figure 9
After trimming the corners the edges need to be folded in. Glue the fabric as shown in Figure 9 and fold it in. Protect the work surface from the excess glue with waxed paper. Apply the glue from the fold line to the edge. Then fold in in onto the cover and smooth it out. Where the fabric goes over the edge of the cover make sure that it is tight up against the edge. There should be a step visible in the folded fabric where it bends up from the double layer of fabric over the edge of the cover and then bends again to go over the inner surface of the cover. If it’s not tight like this the double layer of fabric will not lie smooth when it is folded in along the edge of the cover.

Figure 10
Be sure that the corners are both folded in and firmly glued down. With the corners secure it is time to glue the edge opposite the binding down. Apply the glue from the edge of the cover out to the edge of the fabric. Be sure that there is glue on the edge of the cover where the fabric will be wrapped over it. Fold the fabric in and smooth it down. Insure that the fabric is tight against the edge of the cover. If glue comes through the fabric where it is tight around the edge of the cover wipe the excess off. Make sure that the folded edges of the fabric are down tight against the cover. They have a tendency to lift but if you make sure they are down until the glue takes a good grip on them they will stay down. If they are not down they result in a bump on the inside of the cover of the finished pocket notebook.
When the glue is dry, repeat the process on the other cover. Waiting until the glue is dry insures that the fabric stays flat against the cover and that the first sheet of paper won’t get stuck to the cover.
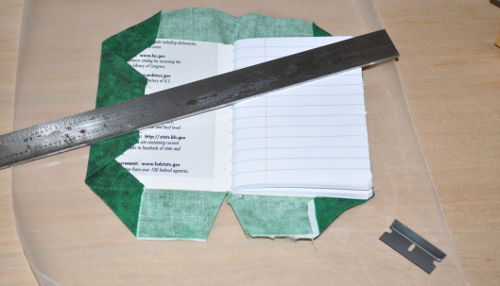
Figure 11
Use the single edge razor blade (or the point of the knife) and cut a notch in the fabric from the centerline of the binding to the edge. This notch allows you to fold the fabric in over the cover from the top and bottom of the pocket notebook. The composition book is bound by stitching through all of its pages in a single line. Therefore a notch that comes to a point at the edge of the cover on the line of the stitching can be folded over the cover from both sides of the stitching. Only an extremely short section of the fabric is not folded over the cover.
Be sure that you don’t cut the notch with the waxed paper under the fabric, cut the notch, then put the waxed paper in place to keep glue off your work surface.
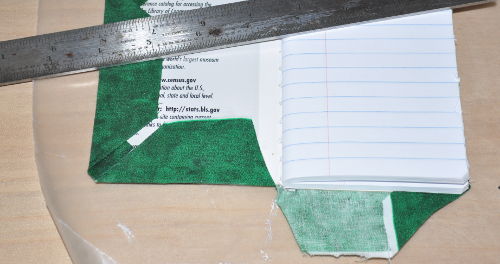
Figure 12
With the notch cut in the fabric apply the glue and fold the fabric around the edge of the cover the same way that it was done on the edges opposite to the binding. Glue down the remaining three sections of cover. Be sure to keep the cover separate from the pages while the glue is wet. If you end up gluing a page to the cover it can spoil the appearance of the final pocket notebook. You can always cut a damaged page out, but it’s better to keep the pages away from the covers until all the glue has dried.
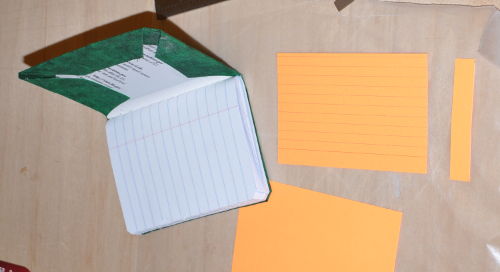
Figure 13
With all the fabric edges folded in and glued down the inside of the covers are partially covered with fabric. This is unsightly and prevents you from writing anything on the inside of the covers. The answer is the 3 by 5 index card. The 3 inch side is about right, but the 5 inch side needs to be trimmed a little. The ones in figures 13 and 14 are orange, to add a little color when the cover is opened.
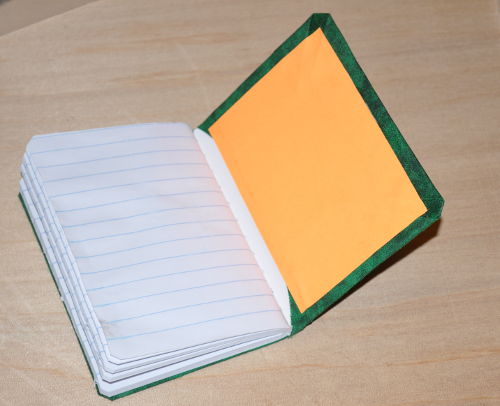
Figure 14
Apply glue to the ruled side of the trimmed card then glue it in place on the inside of the cover. Smooth it down well. The moisture in the glue should soften the card just enough so that you can get it in contact with the cover in the corners where the folded fabric causes bumps.
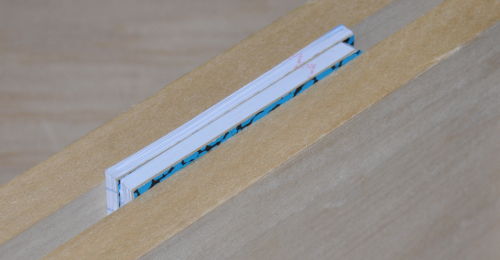
Figure 15
When you make two pocket notebooks from a composition book you first cut about half the width of the composition book off. Unless you do something with the cut off pieces you have just wasted a bunch of paper. The solution is to make a couple of scratch pads from the cut off pages. First clamp the neatly stacked pages up in the press. Half of the pages should be out of the press and half in. Then cut them so that you have two equal piles about 4 inches wide and 4.75 inches tall.
Stack them up so that you have one of the cardboard cover pieces on the bottom, then half the paper followed by another piece. Put the other half of the paper on the top. Jog the pile so that all is in a neat and even pile and clamp the whole stack in the press so that about an eigth of an inch of the shorter side sticks out. While it is clamped carefully spread your PVA glue on the exposed edge and let it dry. Add a layer of glue and let it dry, repeat several more times until you have a visible layer of cured PVA on the edge of the pads. If desired you can glue a layer of cheese cloth onto the edge of the pads. The cheese cloth will make your pads better able to remain in one piece with repeated handling.
When the build up of glue is thick enough and thoroughly dry unclamp the press and remove the pads. If you added a layer of cheese cloth carefully trim the cloth and separate the two pads with a single edge razor blade.
If you desire you can make one thicker scratch pad rather than the two shown here. If you do make one thicker pad use of cheese cloth is recommended to help insure that the pad stays together as you use it.
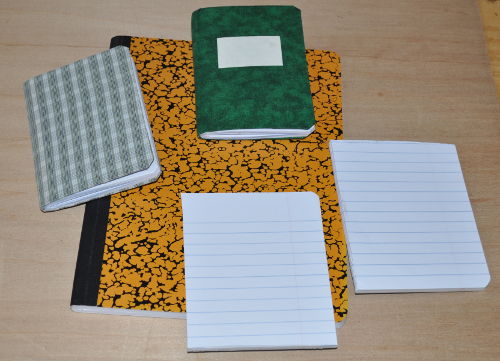
Figure 16
Figure 16 shows the two pocket notebooks and notepads together with an unmodified compostion book like the one that was cut up to make them. One of the notebooks has a label added to the front cover, the other does not. They were covered with two different fabrics, which makes quick identification of them easier if both are being used at the same time. The plaid was cut from the sleeve of an old shirt that was headed for the trash. The other was a left over from binding a book.